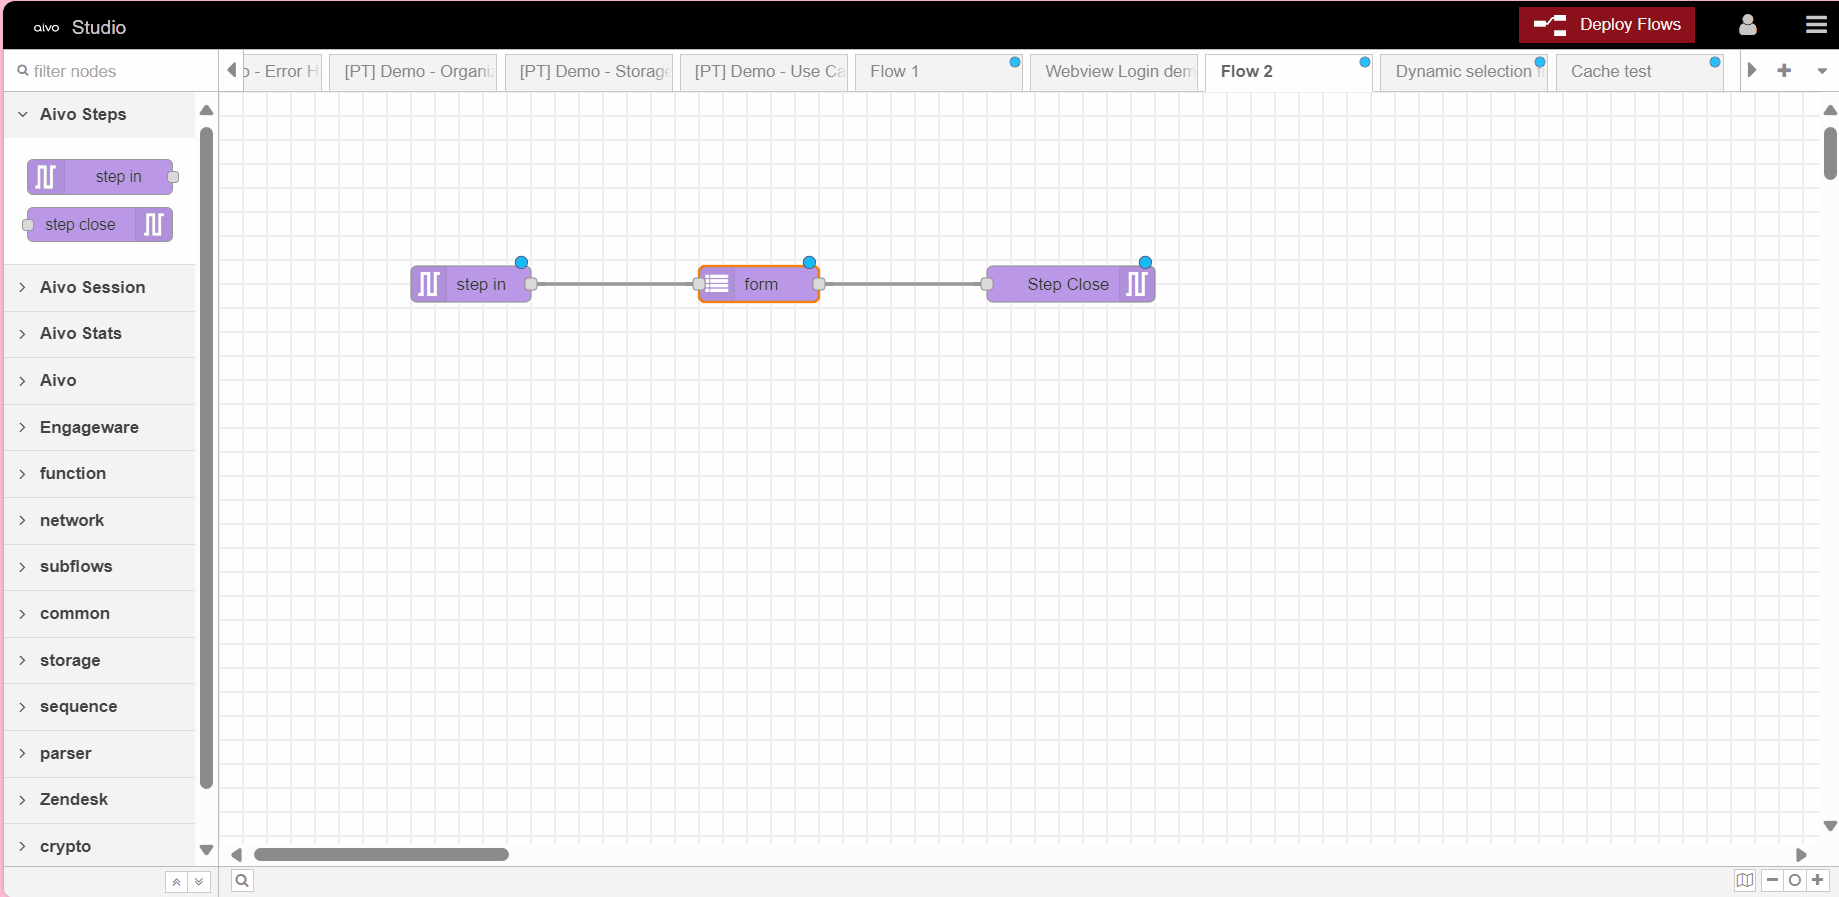
Nodes are the primary building blocks for building flows. When you enter the Studio platform, you will find the different categories available that you can use in your developments.
The usual way to incorporate them into the workspace or canvas is by dragging them from the nodes palette and you will connect them to each other using cables, through their ports.
Other possible ways to add them to the canvas are using the quick add dialog box or importing from the library or clipboard.
 Learn more about the Platform Studio interface: What is it?
 It is important to keep in mind:
● A node can have at most one input port and many output ports.
● If a node has unimplemented changes, it displays a blue circle above it.
● If there are errors with your configuration, it displays a red triangle.
● Some nodes include a button on their left or right edge. These allow some interactions with the node from the editor. The Inject and Debug nodes are the only parent nodes that have buttons.

● A node's configuration can be edited by double-clicking the specific node or pressing enter when the workspace has focus.
● If multiple nodes are selected at the same time, the first node in the selection will be edited.
● The editing dialog contains three tabs:
- Properties: the editing form specific to the type of node being edited.
- Description: documentation per node formatted with Markdown. This is displayed in the information sidebar when the node is selected.
- Appearance: in this tab you will see the options below that are useful to customize the appearance of the node.
- Label: select whether to display node labels.
- Icon: change the node icon.
- Port labels: used to customize the node labels. undefined
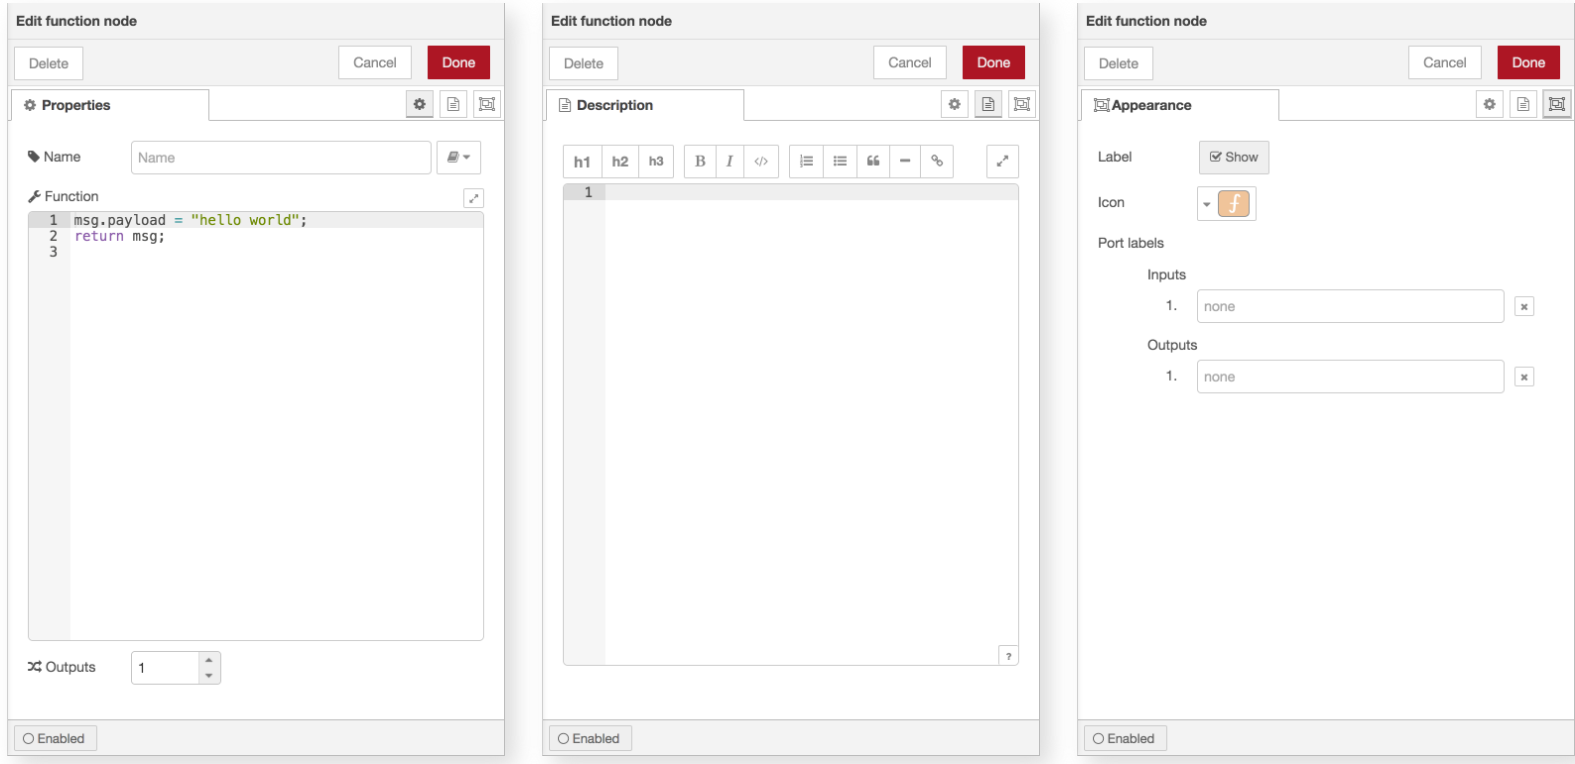
● You will be able to enable or disable nodes, using the toggle button at the bottom of the edit box.
● If a node is disabled, it will not be created when the flow is deployed.
● If a disabled node is in the middle of a flow, no messages will pass through it.